
In this blog, I’ll show you how to add different product gallery styles in a Woo store.
In a competitive WooCommerce store, showing your products with the same basic gallery layout everywhere limits your ability to display products properly and sell effectively. Different products deserve different visual treatments. If you sell multiple types of products, you need multiple product gallery styles.
Let’s watch some examples from Amazon.
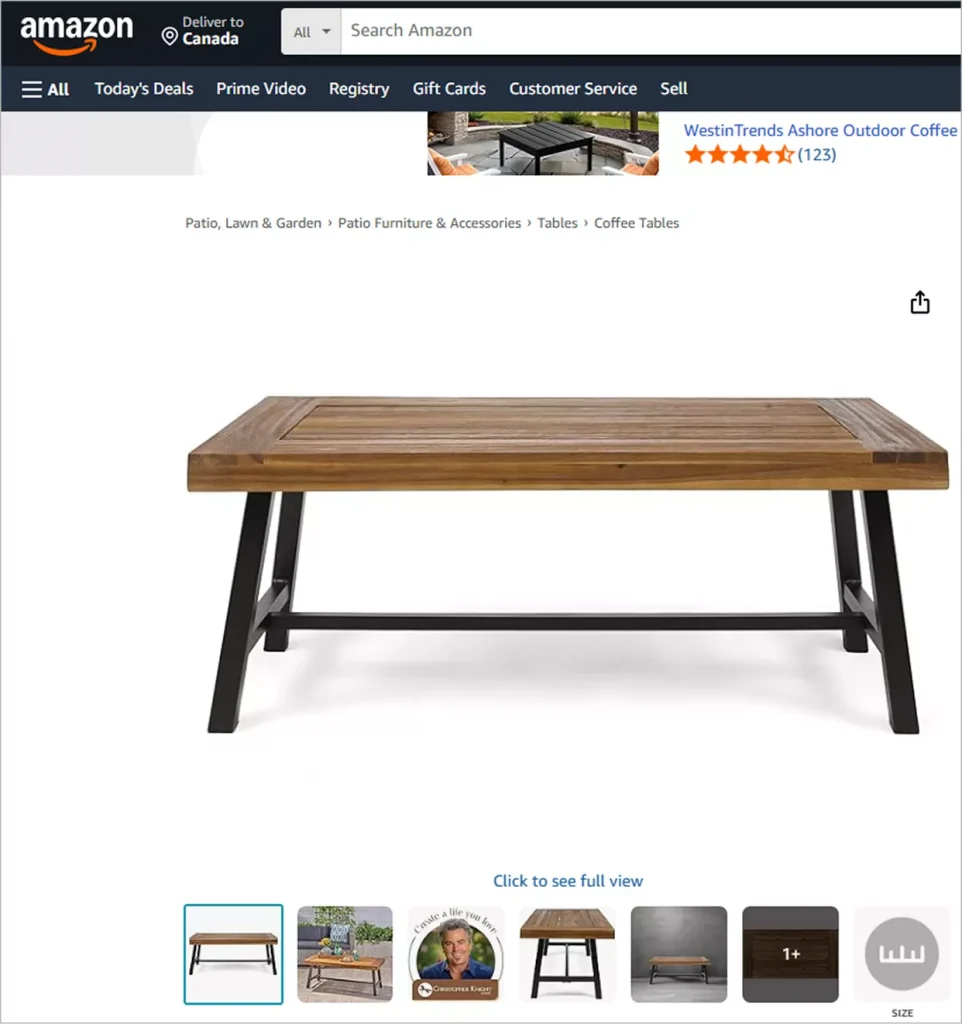
The elegant tea table shines in a horizontal thumbnail slider– wide, lifestyle-focused images let shoppers appreciate its scale, details, and perfect fit in any living space.
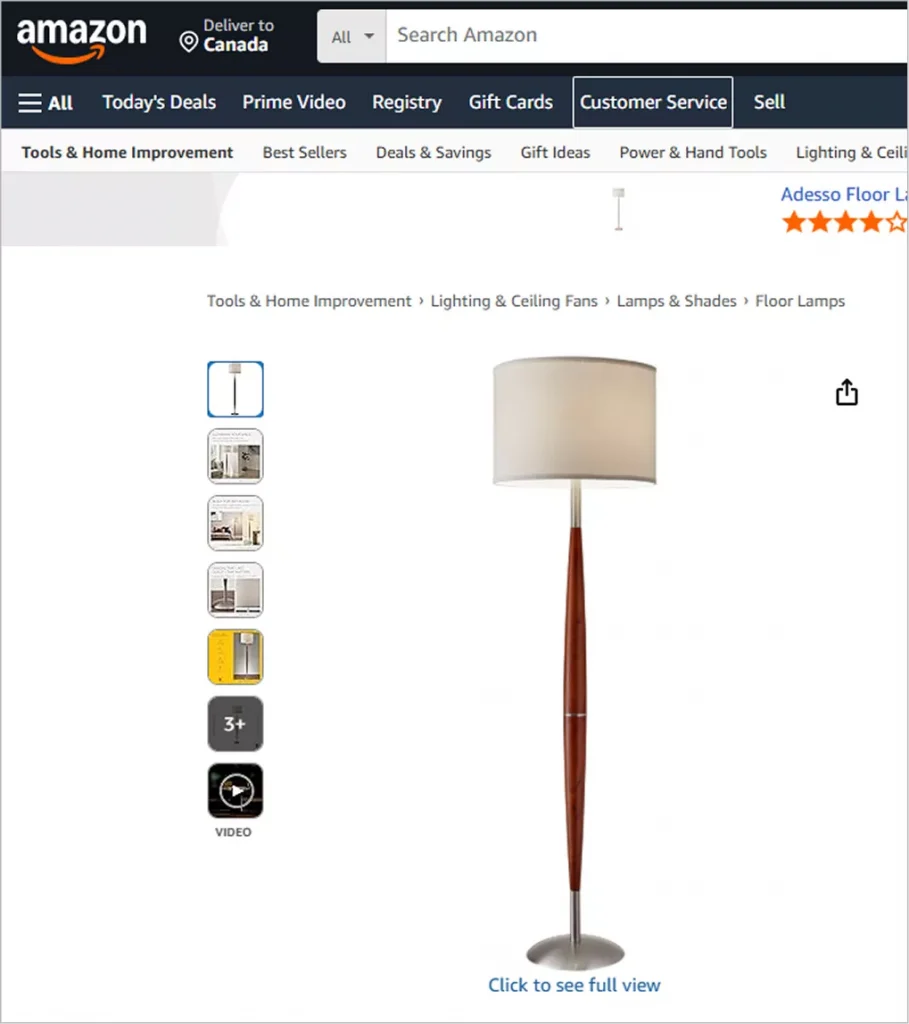
The tall floor lamp, on the other hand, looks stunning in a vertical thumbnail slider– all narrow previews highlight height, design lines, and lighting effect from top to bottom without cropping or distortion.
One layout doesn’t fit all. Stop forcing products into the wrong frame. Give each one the showcase it deserves and watch conversions climb.
Let’s get in.
3 Easy Steps to Add Different Product Gallery Styles in a Single WooCommerce Store
Step 1: Get WooGallery
WooGallery is a comprehensive product gallery plugin for WooCommerce that lets you create and assign multiple unique gallery layouts based on product type, category, or specific products. It goes far beyond the default WooCommerce gallery by offering modern, conversion-optimized gallery styles used by top brands.
WooGallery Key Features:
- 16+ modern product gallery layouts used in the world’s top brands.
- Assign different gallery layouts by product, category, brand, etc.
- Video support in galleries and shop pages
- Advanced zoom and lightbox
- Mobile-friendly responsive product galleries
- A lot of robust features and easy customizations
Let’s install WooGallery.
Step 2: Create Different Product Galleries
Once WooGallery is installed and activated, follow the simple steps below.

- Go to WooGallery in your WordPress admin sidebar.
- Click Manage Layouts.
- Click Add New Layout.

- Name the layout after the product or category you are creating it for
- Choose the gallery layout that fits the product or category best.
- Customize the gallery following your store’s design styles.
- Publish your layout.
This way, you can create as many different product galleries as you need. You can explore the world’s best product gallery examples to get some innovative multiple product gallery ideas.
Step 3: Assign the Product Galleries to Different Products or Categories
You’ve already created one or more custom gallery layouts. Now it’s time to assign each layout to the right products or categories.
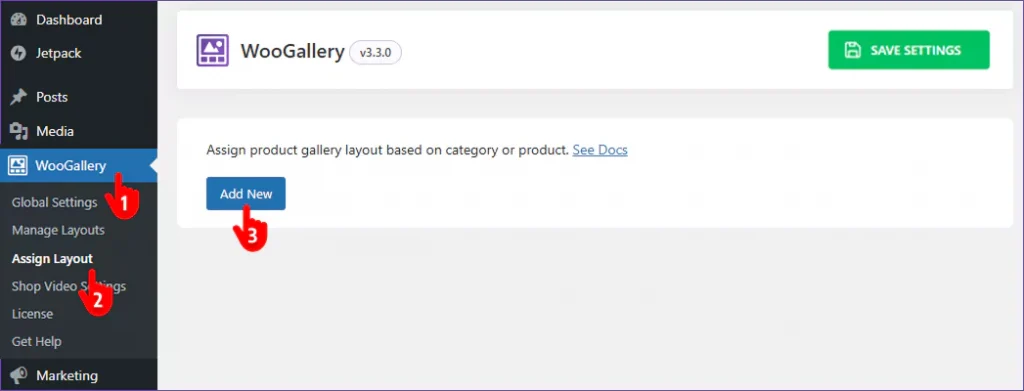
- Navigate to WooGallery again.
- Next, click Assign Layouts.
- Then, click Add New and have the following options.
Follow the next steps.
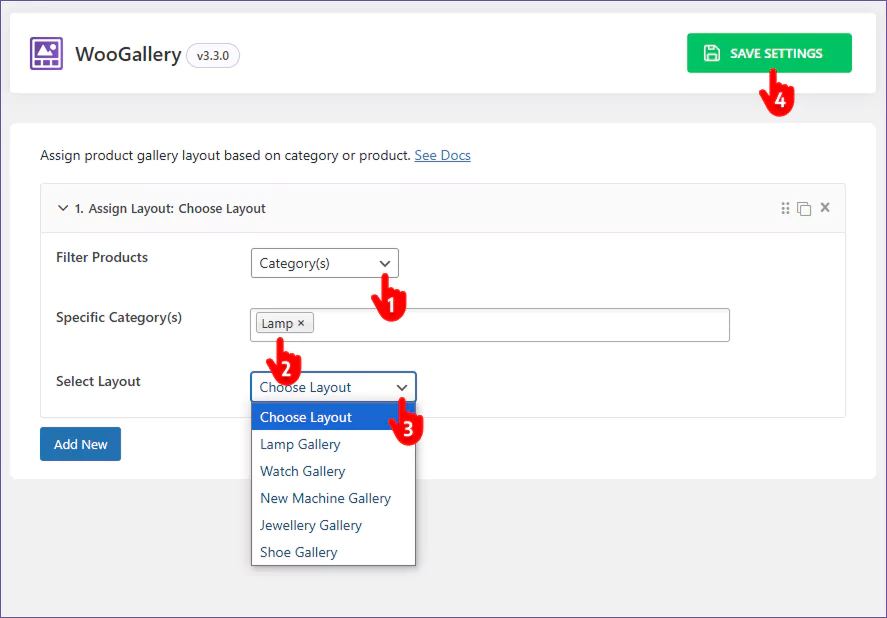
- Choose Product(s) or Category(s) filter options.
- Pick the product(s) or category(s).
- Select the different gallery layout you created to add to the filtered products.
- Finally, hit the SAVE SETTINGS button at the top right.
You can also assign gallery layouts instantly while editing any product– simply select your preferred layout from the convenient dropdown in the right sidebar of the product editor, no need to navigate through separate settings.
Takeaways
A product gallery can make or break a sale. WooGallery empowers you to create strategic, product-specific gallery layouts that can significantly enhance product viewing experience and grow sales.
In addition to different layouts, WooGallery offers a lot of robust features and easy customizations.
So, let’s take your product gallery to the next level and boost sales with WooGallery.
Leave a Reply