Installing WooGallery Pro is pretty simple. After purchasing the Pro version, you’ll receive a download link in your purchase receipt email.
Alternatively, you can download it from your ShapedPlugin account by going to Dashboard → File Downloads.
Once downloaded, locate the ZIP file (woo-gallery-slider-pro.zip) on your computer and follow the steps below to install WooGallery Pro on your site.
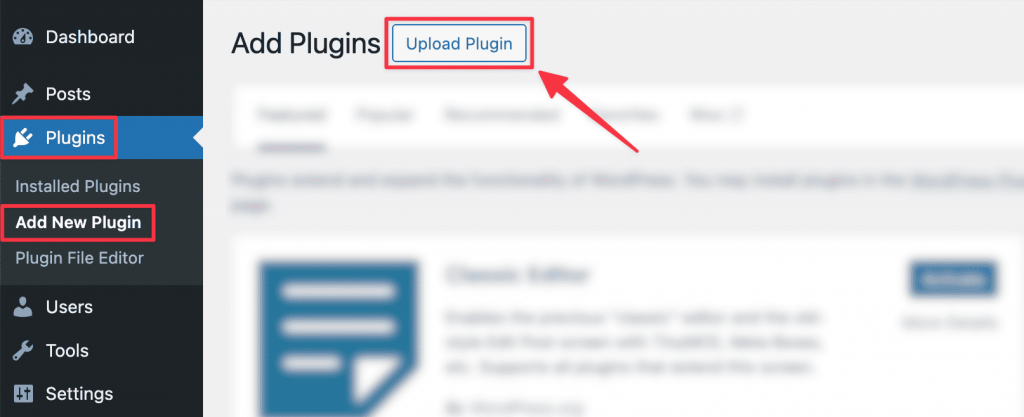
1) Go to your WordPress Dashboard → Plugins → Add New Plugin.
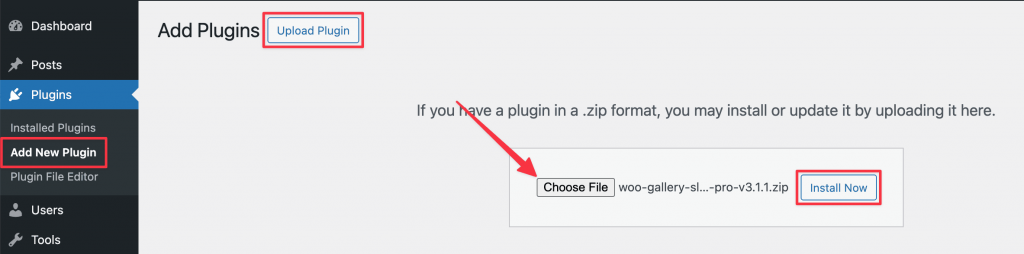
2) Click the “Upload Plugin”, select the zip file, and click “Install Now”.
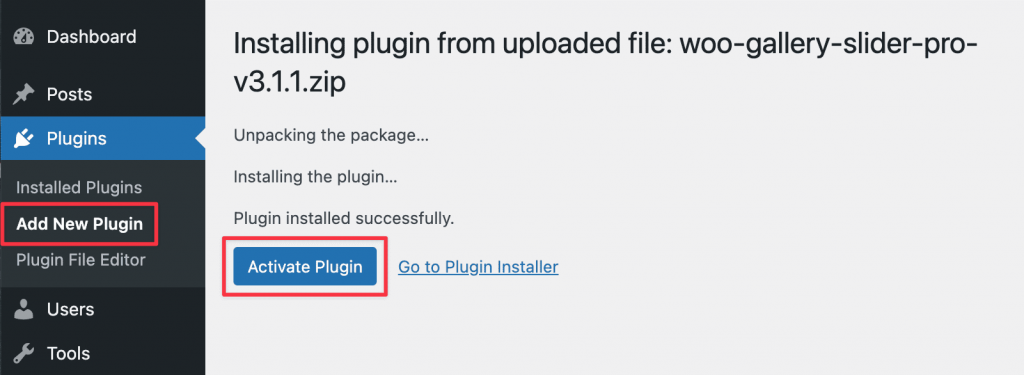
3) Once installed, click “Activate Plugin” to activate it.
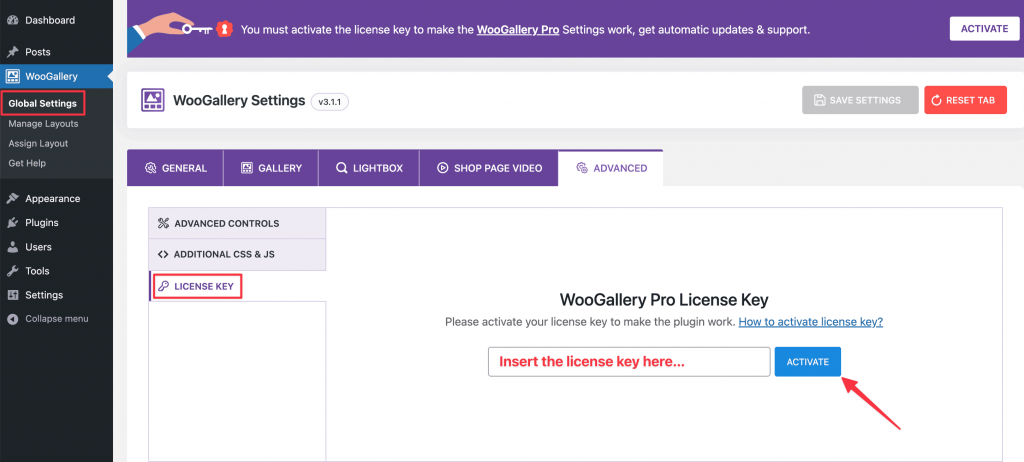
4) You’ll be redirected to the License Key input field. Insert your license key and click “Activate”.
That’s it! You’re now ready to add product gallery images and display them beautifully on your Product Description pages.
Watch the video to see the visual implementation of the above steps.